Autumn is upon us, which means more time spent at home—time to start tackling all those design projects you’ve been dreaming up over the summer! Give your stairs a brand new look, freshen up your fireplace facade… There are so many projects to choose from, and don’t worry, there will be time for them all.
But first, let’s take a moment to consider your entryway. It may not be at the top of your to-do list, but here’s why it should be: your entryway sets the vibe for the rest of your home decor. It is the space that greets you when you arrive home after a long day and the first impression your guests will get when they come over. Make it welcoming and make it stand out.
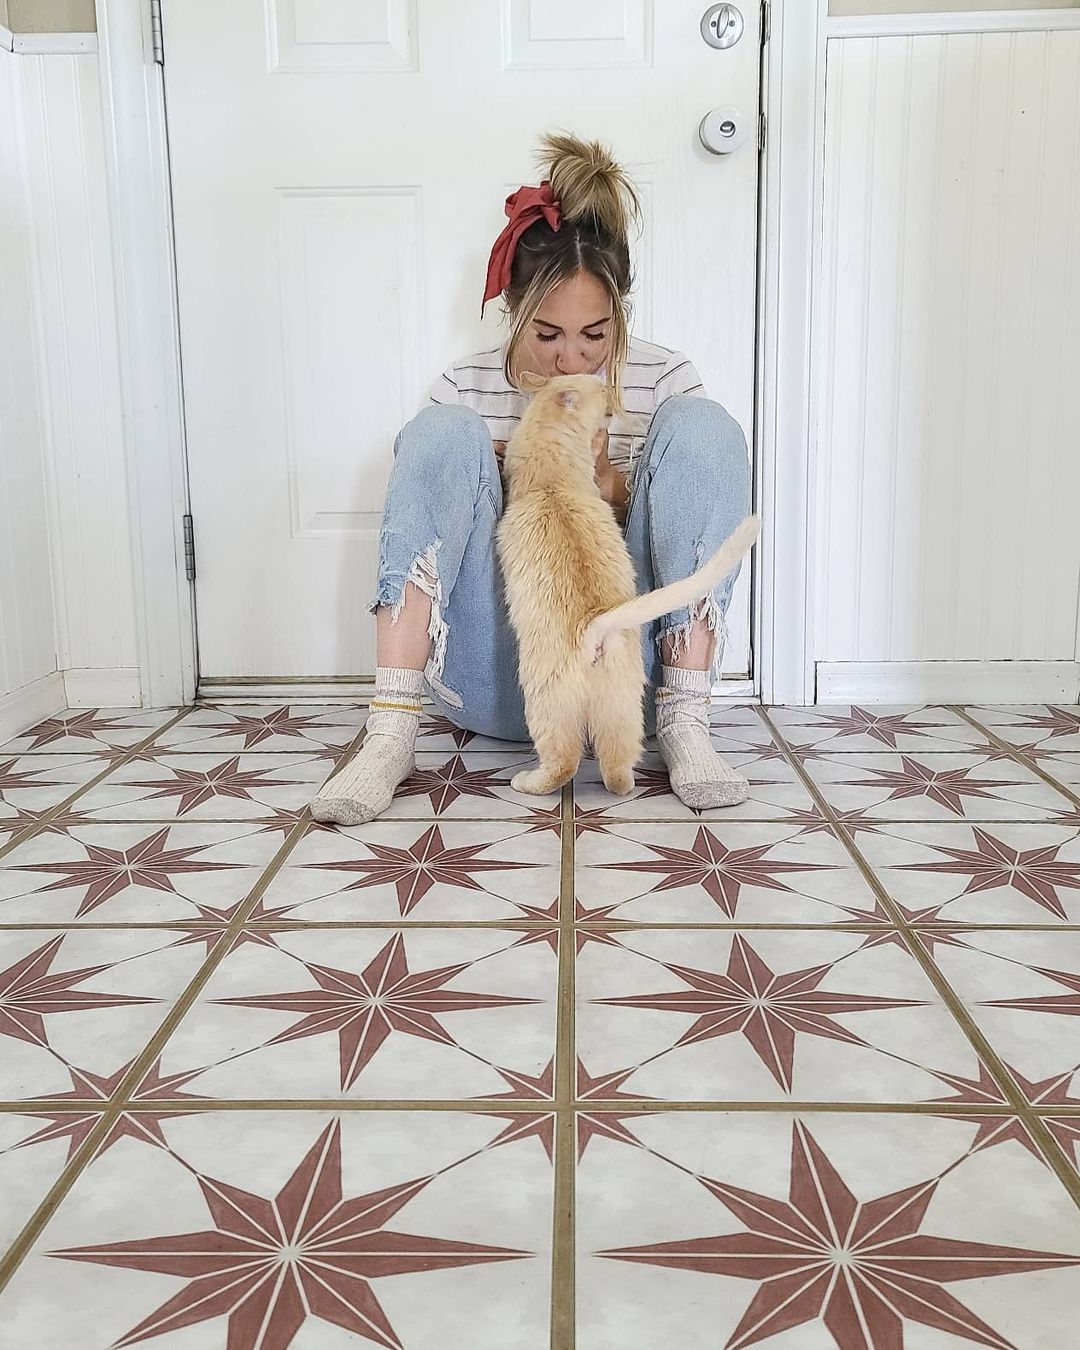
Watch Kelli of @thehomebodyhomestead install Quadrostyle Astra Tiera Red tile stickers in her entryway ↓
The best part is that your entry is just a small corner of your home, so sprucing it up takes no time at all. To give your entryway the glory it deserves, you only need to make a couple of tweaks, starting with your floors.


Image: Astra Tiera Red tile stickers, @thehomebodyhomestead
Quadrostyle stickers offer an easy and impactful solution to a drab entry floor. If your entry is tiled, we’ll show you how a handful of tile stickers easily add much needed personality. For non-tiled floors, we’ll show you how peel-and-stick floor panels can help boost or define your entry area to create a more welcoming passage to your home.


Image: Marta floor stickers, @cath.gorill
Why sticker your entryway?
- Revive a high traffic area — With all the comings-and-goings of your home, the entryway is a heavily frequented space, which means it can get pretty beat up. You may notice that your existing tiles have started to become discolored or worn out. Lucky for you, tile stickers cover up shabby tiles in a cinch!
- Make a good first impression — We’ve said it before, but it’s worth restating: the entryway sets the tone for the rest of your home. It is the space that welcomes and greets your guests. Making sure it’s nicely decorated is a surefire way to make a good first impression. Give visitors a taste of who you are from the moment they step foot in the door.

Image: Astra navy tile stickers, @gilliandesign
- Define the foyer — If your abode doesn’t have a defined entryway, you can make one using stick-on floor panels. Defining an entryway is especially interesting if you live in a studio, where even a small landing area at your doorstep contributes a sense of purpose to the open space of your home.
Watch decorator Alexandra Gater guide one studio dweller as she creates a mini entryway with a Quadrostyle Zeus floor sticker ↓
Renovate Your Entryway With Tile Stickers
If your entryway is already equipped with floor tiles, all you need to give your foyer a boost is a handful of tile stickers. Your entryway establishes the mood for the rest of your home, so make sure to choose a pattern that is cohesive with the rest of your home decor.
Browse 150+ tile sticker patterns →
Installing tile stickers is quite literally as simple as pressing on a sticker, though there are a few precautions you’ll want to take when installing tile stickers in your entryway. Carefully follow the directions below to make sure that your entryway turns out as impressive and flawless as possible!

Image: Astra navy tile stickers, @gilliandesign / Lys tile stickers
Step 1: Gather your tools
You’ll need:
- A clean cloth or towel
- A utility knife or scissors
- A pencil
- A tape measure or ruler
Step 2: Clean your Floors Thoroughly
First, vacuum your floors. Then, follow up with a standard multipurpose spray cleaner.
This step is important, so don’t skimp when it comes to cleaning! Any leftover crumbs or dust particles will be trapped under your stickers, weakening the adhesive and leading to unsightly air bubbles.
Step 3: Apply stickers to all full-sized tiles
Starting in the center of your floor, install your tile stickers to the existing tiles. Peel off a bit of the sticker backing. Then, line up the edge of your sticker with the edge of your tile, leaving about 1 mm of space around the border. Using a clean cloth, slowly and carefully smooth the sticker onto the tile while gradually peeling away the rest of the sticker backing.
Unstick and reapply as necessary to ensure that no air bubbles remain.


Image: Custom Nevada Floor Stickers, @spacesbybrennan / Astra Tiera Red Tile Stickers, @thehomebodyhomestead
Curious about custom orders? Learn more here →
Step 4: Apply and trim remaining tile stickers
Tile stickers that touch the wall may need to be trimmed to fit the tile. The easiest way to ensure a perfect fit is to begin applying the tile sticker as normal. Start by lining up the tile sticker with the edge opposite the wall, then use your cloth to smooth on your sticker as normal.
When you reach the wall, use a straight edge to firmly press the sticker into the crook where the wall meets the tile. Finally, run a utility knife along the crook to trim off the excess sticker. The video above shows clearly how this is done.
If you don’t have a utility knife, you can also measure each tile and trim off the excess with scissors, but do be precise!
Repeat the process for each remaining tile and voilà! Your floors are as good as new.
Create an Entryway Using Floor Panels
Not all homes are designed with a dedicated entryway. Some front doors open directly into a free space. This is especially true in smaller homes, such as studio apartments.
If your home falls into this category and you find that your home is lacking because of it, you can create your own foyer using Quadrostyle floor panels. These large sticker panels can be trimmed down to fit a small landing space or joined side-by-side to create a spacious entry area.
NOTE: For a successful installation, ensure that your floors are smooth and have a laminated, glossy, or otherwise non-porous finish.

Image: Zeus floor sticker, @alexandragater
Step 1: Outline the entryway
Delineate the space you want to dedicate to your entryway and jot down the measurements.
If you want to keep it simple, you can skip this part and just center an entire sticker panel in front of your door.
Step 2: Trim your sticker panel(s)
Unless you are going to install a single, full sticker panel, trim your sticker or stickers to fit your desired entryway.
Step 3: Clean the floor
Clean the floor where you are going to establish your entryway. Go over the area first with a vacuum, then use a multipurpose cleaner and clean cloth to remove all traces of dirt and dust.


Image: Marta Floor stickers, @cath.goril / Sierra floor panel, @enidthebus
Step 4: Apply your sticker
Begin by peeling back a small portion of the sticker backing and matching the edge of the sticker with the doorway and wall. Use a clean cloth to smooth on the rest of the sticker panel, carefully pushing out any air bubbles that form along the way.
Unstick and reposition as necessary to ensure that your sticker is perfectly lined up.
If you are using multiple floor stickers, line them up edge-to-edge and continue until you have installed all your floor panels. Floor panels are designed to fit side-by-side, so be careful to line them up evenly along the printed grout lines.
(Optional) Step 5: Border with Adhesive Floor Trim
To accentuate your newly defined entryway, you can add an adhesive floor trim to the border of your sticker. Not only will this contribute an extra sense of definition to the entry area, it will also help elongate the lifespan of your stickers!

Floor Sticker FAQs
- What kind of floors can I install Quadrostyle stickers on?
As long as your floors are smooth and non-porous, you should be good to go.
Here are some common flooring types that work with Quadrostyle stickers: smooth ceramic tiles, linoleum, vinyl, laminate flooring, parquet and varnished wood, sealed concrete, and sealed polished stone. See more →
Here are common flooring types that do not work with Quadrostyle stickers: rough, textured floors, unsealed subflooring, unsealed plywood, raw wood, waxed or oiled wood, waxed tiles, and damp or cracked surfaces. See more →
- How thick are they?
Tile stickers and floor panels are both about as thick as a playing card—23 mils to be exact! Thick enough to stand up to wear and tear and thin enough to install over your floors for an imperceptible finish.
- I’ve got pets, kids, and a generally busy household, will these stickers hold up?
Our floor stickers may look unassuming, but they’re mighty durable, which is important for a high-traffic area like the entryway!
When installed properly (no loose edges or air bubbles), tile stickers and floor panels can stand up to cats, dogs, and other clawed pets, chaotic kids, and all the mess you track in from outside!
Quadrostyle stickers are also water-resistant, so no need to worry about any splashes that occur on rainy days.
- Can I clean them as I normally would?
Again, as long as your stickers are carefully installed, feel free to treat them as you would normally treat your floors. Sweeping, mopping, and vacuuming are all good ways to clean your floors.
Got more sticker questions? Find the answers in our FAQs! →
Share your results!
Your sticker projects are a constant source of inspiration for us, so, pretty please, show us your results. We can’t wait to see how your entryway renovation turns out.

Leave a comment
All comments are moderated before being published.
This site is protected by hCaptcha and the hCaptcha Privacy Policy and Terms of Service apply.